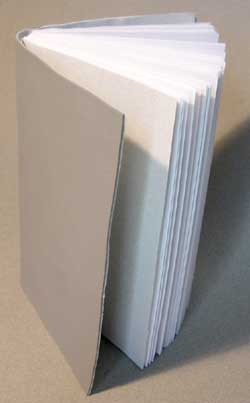
What we'll make:
Your very own Moleskine-like-notebook/journal/sketchbook. The one we'll be making is 3.5 x 5.5 x .5 inches. I use this size because it fits nicely into my back or front pants pocket. Strangely enough it is also the same size as the Moleskine notebook. For the pages we'll be using 20# bond paper (the same paper you use in your copier and inkjet printer). As you might have noticed in the dimensions, the notebook is a half-inch thick. This gives you 192 single pages of writing/sketching/painting fun. For the cover we'll use vinyl Naugahyde (that's what I use but feel free to use whatever you have on hand). After we're through I'll offer a list of enhancements and alternative ways to make your notebook/journal/sketchbook to meet your individual needs.
Don't be put off by the many steps involved. This really is a simple project using common materials and tools. Almost anyone can do it.
This particular notebook was developed over many years of feeble attempts to organize my thoughts, appointments and small sketches. Here's how this whole make-my-own-notebook thing evolved: scraps of paper >> index cards (still love 'em) >> Daytimer >> handmade daytimer >> single signature booklets (stapled) >> multi signature booklets >> to what you see here. This is my own design based on much trial and error.
I hope you enjoy making and using them as much as I have. If you enhance the design any please share your ideas with me and I'll post them in the enhancements section.
Table of Contents:
- Page 1.
- Materials Needed
- Tools Needed
- Step 1. Cut paper
- Step 2. Fold paper
- Step 3. Collate folios
- Step 4. Mark spine
- Step 5. Punch holes
- Page 2.
- Page 3.
- Page 4.
- Step 8. Glue endpapers & cover
- Page 5.
Materials Needed:
- 24 sheets of paper 8.5 x 11 inches (use 20# bond at first then you can try other types of paper)
- One 8.5 x 11 inch sheet of a "special" paper. This will be used for your endpapers. Endpapers are the pages that bind to the inside of the cover and the first page of your notebook. Some people use marbled paper, some use vellum, I use French Speckletone. You can use plain bond paper but that would be boring wouldn't it.
- A piece of Naugahyde that measures 9 x 5 5/8 inches. I get mine at Walmart or the local fabric store. Look in the remnants section first, if you're not picky about the color you can sometimes find a great deal. You don't have to use Naugahyde. The first notebooks I made I used a 65# cover stock (a heavier weight paper). So if you have everything but the Naugahyde scrape up some cardstock and use it. The easiest way to tell if it is heavy enough is to get out a business card and check the weight of your chosen cover paper against the weight of the business card. A typical business card is 65# cover. If your cover stock is at least as heavy as the business card it will work fine. Just remember that if you use a paper cover stock for your notebook cover it will not hold up as well as a vinyl one.
- Cheesecloth or an open weave fabric approximately 1.5 x 5 inches
- Upholstery thread. You can use regular sewing thread in a pinch but the upholstery thread works a lot better. I use white but the color really depends on the color of your pages.
- A small sheet of Wax paper or glassine paper.
Tools Needed:
- A bookbinders needle. You can use any large needle really. But you'll want it larger than a sewing needle. If you look in the craft section of your favorite discount store you can find a variety pack of needles which contains a couple you can use for this project.
- Beeswax. While not absolutely necessary it does help with the threading of the signatures.
- A bookbinders awl. Some alternatives: a large needle inserted into a clutch pencil, an old drafting compass needle, an ice pick. Whatever you use you don't want the holes to be too large because it makes for slop in the pages.
- Adhesive. Traditional bookbinder glue, cooked flour paste, wallpaper paste, white elmers glue, PVA, etc. I use Aleene's Tacky Glue because it dries flexible and I just happen to have it on hand.
- Xacto knife (and a good surface to cut your paper, i.e. self healing mat, Borco, cardboard, etc.)
- Ruler
- T-square and triangle or some other way to square your cuts
- Heavy books. A full size Jansen's is a good choice as are your dust covered encyclopedias. If you're really into making your notebooks you could invest in a book press or make your own.
- Pencil
- Bone folder or some really strong fingernails
- Binder clips
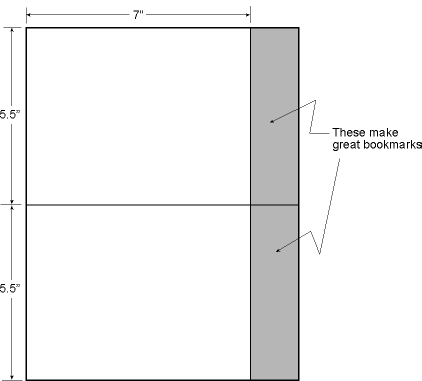
Step 1. Cut paper
Take a sheet of your paper, t-square, triangle and pencil and mark your cut lines as shown. Each 8 1/2 x 11 inch sheet of paper will provide you with two folios measuring 7 x 5 1/2 inches. Once you have your sheet marked up take a stack of between 6 and 12 sheets, jog them on the left and bottom edges so they are all even and place them under your marked sheet. Using your ruler/t-square/triangle and your xacto knife cut the stack into the folios. Cutting multiple pages takes a little practice if you haven't done it before. I cut multiples to save time but you might feel more comfortable cutting fewer pages. Cut all 24 sheets PLUS your endpapers to the finished 7 x 5 1/2 size.
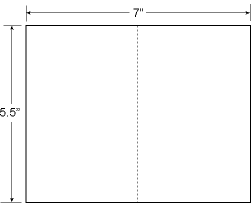
Step 2. Fold paper
Now you have 26 sheets of paper (folios), 24 for your pages and 2 for your endpapers. Using your bone folder, fold each folio in half (dotted line). Make your folds really strong so the pages lay as flat as possible. This will serve you well later in the process and make your book more professional looking. Set your folded endpapers aside for later.
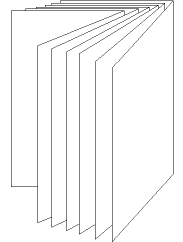
Step 3. Collate folios
Collate six of your folios into a signature as shown then flatten them. They will look like thin booklets. Do this for the rest of your pages until you have a total of eight signatures. Jog the signatures so they are nice and neat focusing on the bottom and spine (folded edge) and stack them on top of each other in the same direction.
Step 4. Mark spine
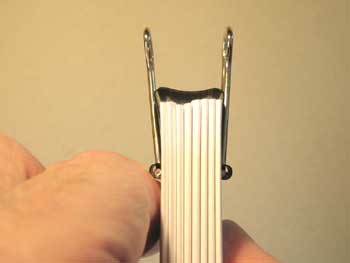
Gather your stack of signatures and once more jog the bottom and spine edges to make them nice and neat. Using your binder clips clamp the top and bottom of the stack as shown.
Unless you are perfect in your cutting (I'm not) you will notice the top edge is a little jagged. Don't worry about it, we'll fix it later. The front edge is too but that's okay. Just make sure the spine and bottom is nice and neat.
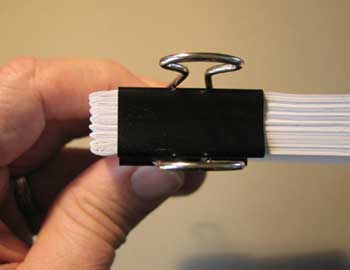
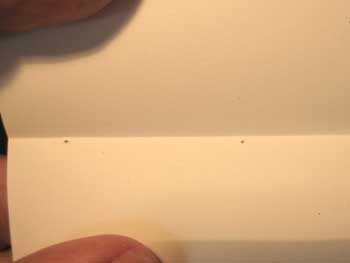
This is how the spine should look after it's jogged.
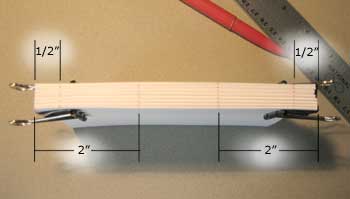
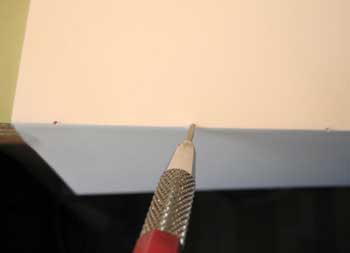
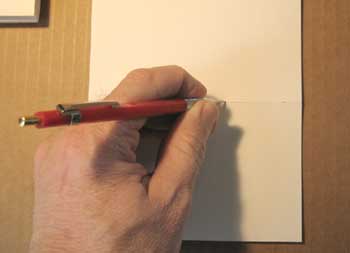
Measuring from the bottom edge of the spine mark 1/2" on one of the signatures. Place another mark at 2", 3 1/2", and 5" from the bottom. Then mark each signature so you have a dot on each spine. These will serve as your guides when punching your holes. You can faintly see the dots in the photo.
Step 5. Punch holes
Remove the binder clips and place your stack to the side of your work area. Open one of your signatures and place it on the edge of something you don't mind putting holes into (I use the edge of my drawing table which is protected by Borco). Be careful to keep the spine together. This can be tricky (especially if you use the second method below to make your holes). It's important to keep the spine together so the holes pass through the edge of the fold, not further into the page. You'll also want to pay attention to keep your bottom edge nice and neat. Using your stabbing instrument of choice push through all six pages. The holes should not be much larger than the needle you'll be using later.
Even if you're careful and you've hit the mark on the outside of the signature when you look on the inside it can sometimes be a little off. While it won't hurt the notebook, you might not like the way the thread shows on the inside of the pages when the book is finished. The more notebooks you make, the better you'll get.
An alternative way to punch the holes is open the signature all the way and place it on a piece of cardboard and punch away. While this method minimizes the possibility of the holes missing the spine on the inside pages, watch the spine as you open the signature because the pages have a tendency to slip out of alignment.