Step 6. Sew signatures
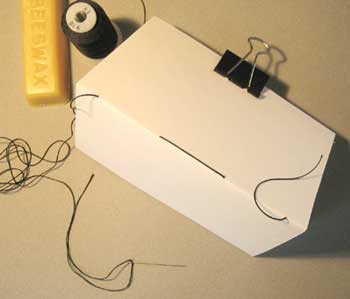
Now comes the fun part. Measure off a length of upholsery thread equal to the number of signatures multiplied by the height of one spine. For instance this project has 8 (signatures) with a spine that measures 5 1/2" so; 8 x 5.5 = 44". It's better to have a piece that's too long than too short. Thread the needle and pull about six inches through the eye. Wax the thread with the beeswax paying particular attention to the area below the needle. This will help hold the two threads together which makes sewing a lot easier. There will be no knot in the end.
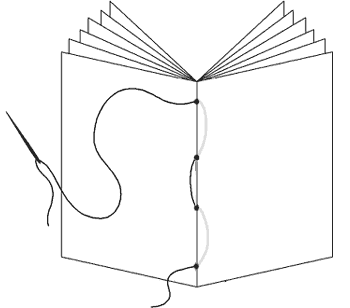
Pick up one of your signatures and open it a little to the center. Starting at the bottom set of holes, push the needle through from the outside to the inside of the spine pulling all but two inches of thread through. We'll tie this later. Then from the inside push the needle through the next set of holes pulling all the slack outside. Then to the third set of holes, again push the needle through to the inside pulling all the slack. Lastly the fourth hole, out goes the needle and thread. The illustration does a much better job of explaining this (the grey lines are inside the signature).
Pull the thread until all the slack is out of the signature while holding the short piece of thread at the bottom. Tip: when you tighten the thread pull in line with the spine instead of at ninety degrees to the spine. This will minimize tearing of the holes.
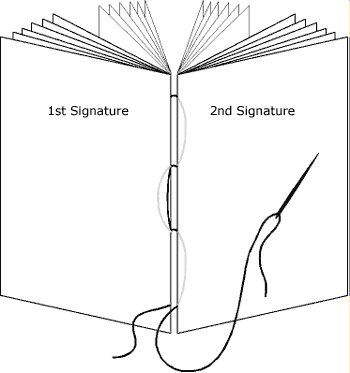
Place another signature next to your first one and push the needle into the corresponding top hole of the second signature. Pull the thread somewhat taught then push the needle out of the next hole of the second signature and then into the corresponding hole of the first signature. Then out of the third hole of the first signature and then into the corresponding hole of the second signature. Then out of the last hole of the second signature. The illustration shows this new path.
I've noticed two things that happen to me when sewing signatures: I feel like I have only thumbs and I lose track of where I started. Here's a method I used in the beginning that made things a little easier. While I don't use it now, I thought it might be of some help. Just move the clips to the adjoining sets of pages as you add each new signature.
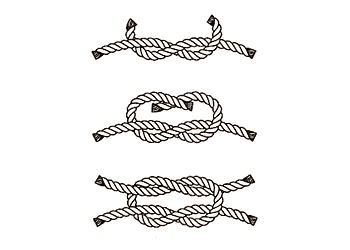
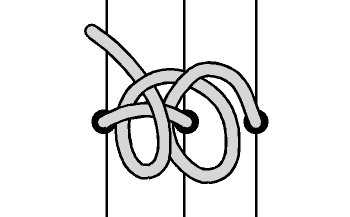
Okay, where were we? You should have two pieces of thread (one short and one long) hanging from your two sewn signatures. Tie a square knot using these two pieces of thread. I've supplied a diagram for those who haven't tied one. Be sure to get the first part of the knot tight before tying the second part; you want your signatures close together. Don't hesitate to triple tie it if you want. Don't cut the excess thread yet.
Place your third signature next to the first two and sew in and out like you did before, making sure to sew into the second signature.
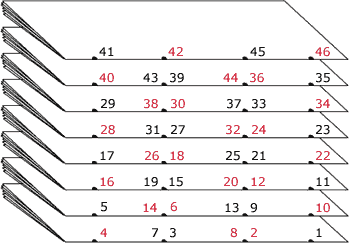
Here's a diagram of how the sewing goes throughout the eight signatures. Black numbers represent the needle going into the spine and the red numbers represent the needle coming out of the spine. 1 is where you started, 10 is where you tied the square knot, and you should now be at 16 wondering what to do next...
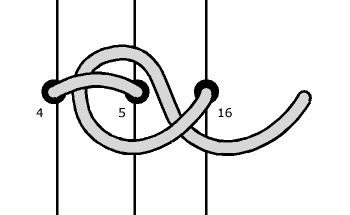
This is called a kettle stitch and it's used to tie each new signature to the one before it. Use this stitch each time you exit the last hole of each signature. Here we're tying the third signature to the first two when exiting number 16. You'll also tie a kettle stitch for 22, 28, 34, 40 and 46. Tip: remember to pull the thread tight, drawing your signatures together, before tying the kettle stitch.
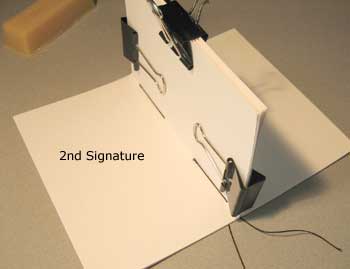
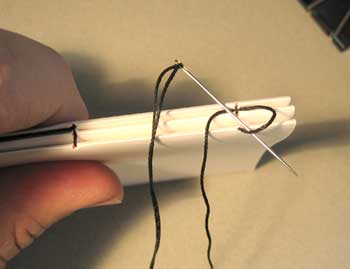
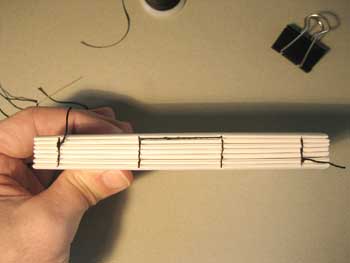
Here I'm about to tie a kettle stitch. Thought you might like to see a photo too. Yeah, I know, it's not exactly the same direction as the illustration but it'll still hold the signatures together.
When you exit the last hole (46) in the last signature finish off with two half-hitches as illustrated. Again, you can add more if you feel you need them. Now trim the tread to about an inch in length. Do the same for the piece that you left when you started on the first signature.
This is what it should look like when you are finished sewing your signatures. Well, almost; your threads will end on the same side, this is a photo of a seven signature notebook so the threads end on opposite ends.