Step 8. Gluing endpapers & cover
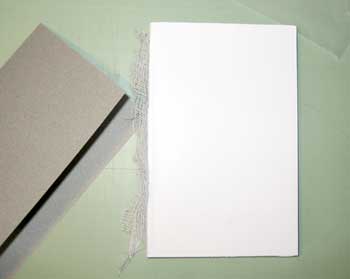
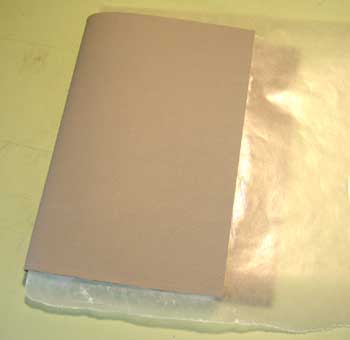
Assemble your dried notebook, Naugahyde cover, wax paper, glue and endpapers. Under the first page of your notebook place a sheet of waxpaper which should be a little larger than the size of your notebook. This will protect your pages from the glue. Make sure the cheesecloth is hanging off to the spine side of the notebook.
Optional: If your cuts weren't as precise as you wanted them to be, leaving the top of your book looking a little jagged you can trim jaggies back to a smooth clean line using an xacto and a steel rule. It's a bit of a challenge because you are cutting slivers on some signatures. I usually just leave it because it adds to that handmade look.
Note: Depending on the type of glue you are using you may have to work quickly through these next steps. It might also be helpful to go through the motions without the glue first to secure the steps in your mind rather than when you have glue all over your hands.
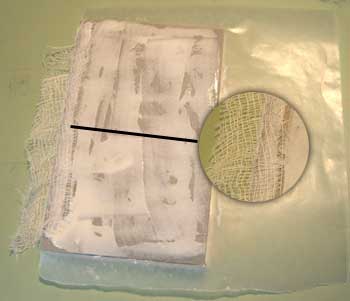
On the top page spread a liberal amount of glue using a stiff piece of cardboard or brush to spread it evenly across the entire surface. Carefully place one of your endpapers on top of the just glued page aligning the fold evenly along the spine of the first signature. Press it evenly and firmly to ensure a good bond.
Repeat the application of glue on the top of your freshly placed endpaper. Now wrap the top part of the cheesecloth around the top of the endpaper and push it into the glue with your fingers. Apply a little more glue on top of the cheesecloth if it looks like not enough has soaked through.
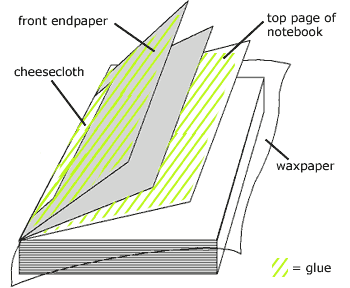
This illustration might help clarify these steps a little better than the photos.
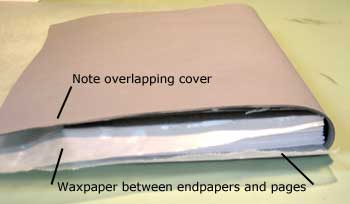
Align your cover over the glue-smeared endpaper with the long end trailing over the spine (photo shows it going around the spine and under the back). It should overlap the top and bottom edges of your notebook by 1/16" and by at least 1/4" on the open side. Press it evenly and firmly to ensure a good bond.
Repeat every thing in step 8 again for the back. When you are ready to glue the cover make sure to pull the cover snugly around the spine before pressing it down on the endpaper. This will put a nice finish on the notebook when it's closed.
Place your notebook under the weights or into your press again letting it dry overnight.
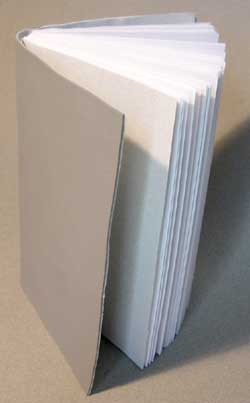
When your notebook is dry just trim the cover. You can trim up to the endpaper or leave 1/6" all the way around which protects the pages a little better.
Congratulations!
Now let's look at ways to enhance your next book.